
How to create a BTC wallet whitelist:
1)
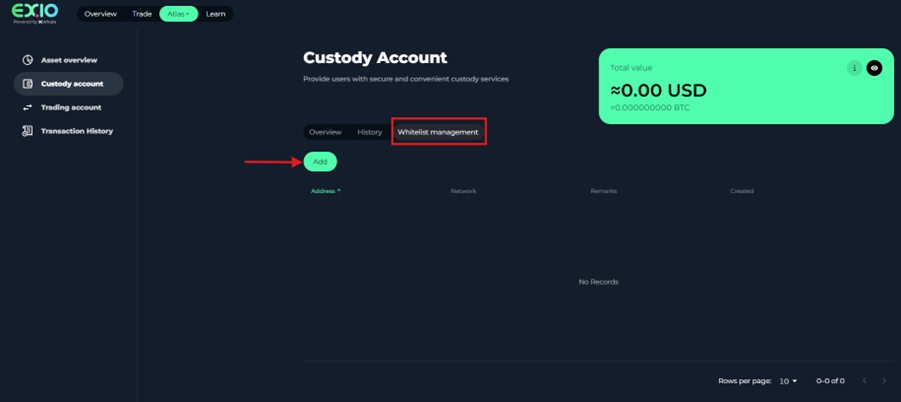
Login to EX.IO account then click “Atlas” at the top of the screen and select “Custody account”.

2)
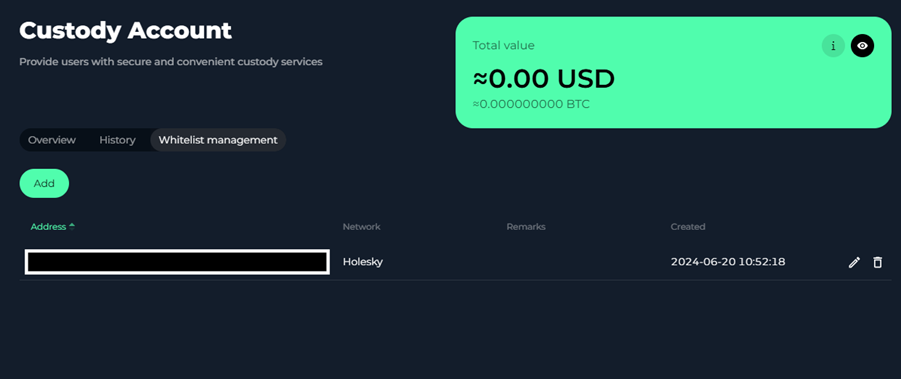
Once you have arrived at the custody account page, click “Whitelist management” at the top of the page.

3)
Click “Add’’ in the top right corner of the screen.

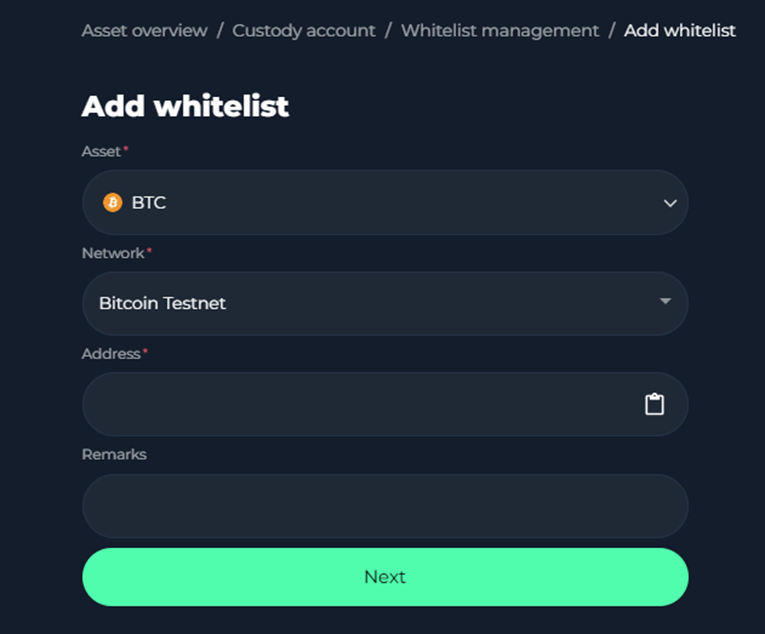
4)
Click on the asset tab and pick BTC asset option. fill in the remaining information and input your wallet address and press “Next”.
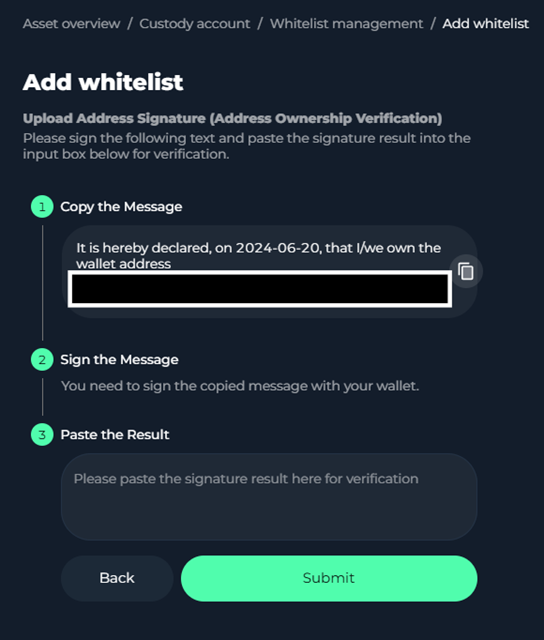
5)
Once you have checked your wallet address and pasted your signature into the designated box, press “Submit” to create the whitelist.
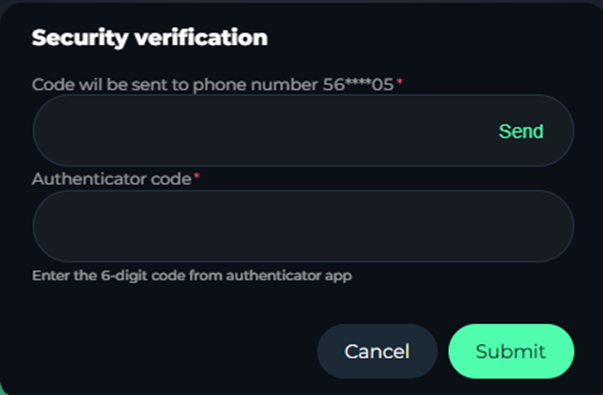
6)
Upon pressing the submit tab, you will be prompted to verify your account using the 2FA. Press sends on the screen to send an SMS password to your designated phone number and go onto your authenticator app to enter your 6-digit password.
7)
Check out the video for a comprehensive guide with step-by-step instructions:
How to create an ETH/USDT wallet whitelist:
1)
Login to EX.IO account then click “Atlas” at the top of the screen and select “Custody account”.

2)
Once you have arrived at the custody account page, click “Whitelist management” at the top of the page.

3)
Click “Add’’ in the top right corner of the screen.
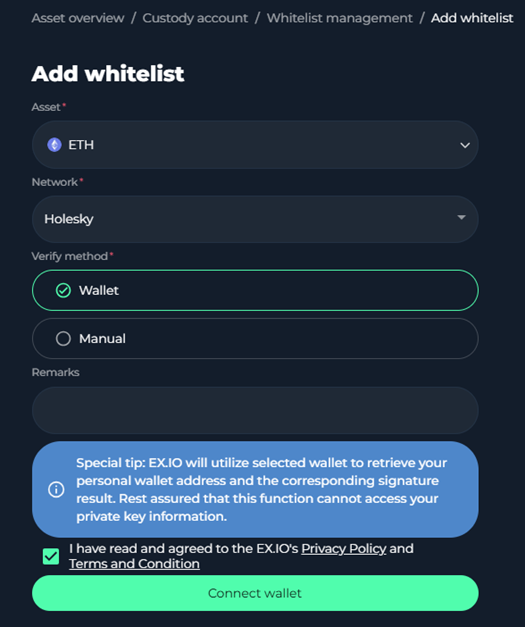
4)
On this page, choose either ETH or USDT then click “Wallet” to connect the personal wallet.
5)
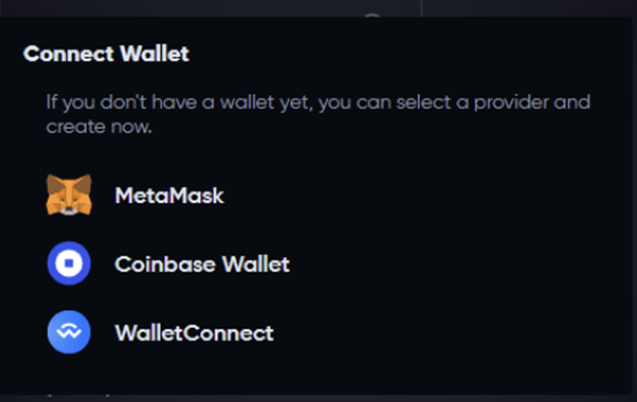
Choose the relevant wallet that applies to you.
6)
Add your wallet address and click “Sign” to add this wallet to your whitelist.
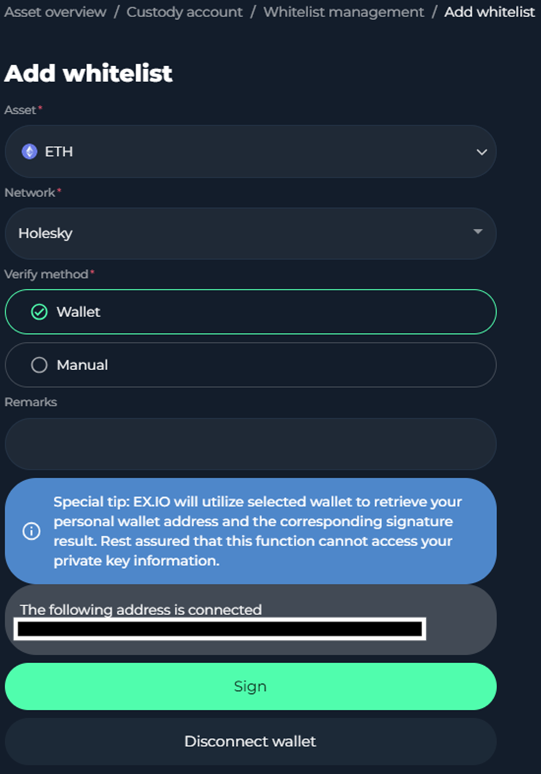
Or you may proceed by entering your wallet details manually by clicking on the “Manual”.

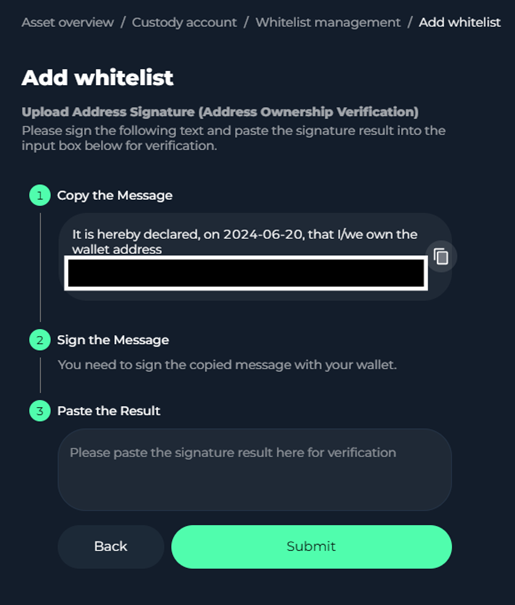
Once you have checked your wallet address and pasted your signature into the designated box, press the “Submit” to create the whitelist.
7)
Upon pressing the submit tab, you will be prompted to verify your account using the 2FA. Press sends on the screen to send an SMS password to your designated phone number and go onto your authenticator app to enter your 6-digit password.

8)
After 2FA completed successfully, the address is added in Whitelist management.
9)
Check out the video for a comprehensive guide with step-by-step instructions: